Tuesday, June 29, 2010

RASTA HERRINGBONE HAT WITH DREADS


KNITTING PATTERN by SARA BALDWIN ©2010

Skill level: intermediate

Materials: One skein Malabrigo Rasta (150 grams and 90 yards), 16 or 20 inch circular knitting needles size #13, double pointed knitting needles (or another circular needle) size #13. A large size yarn needle is useful. To make the dreadlocks topknot you can twist the yarn by hand, but it speeds things up a lot if you have an electric mixer or drill handy!

Size: Hat circumference 19 inches (small). Herringbone stitch is thick and warm, but not very stretchy, so care must be taken to get the correct fit. Measure the circumference of your head around where you like to wear your hat, and make the hat one inch smaller so the fit will be snug, but not too tight. If you need a larger size hat you can go up to size #15 or #17 needles, or cast on more stitches (any odd number will work, but you will have to modify the crown shaping instructions accordingly).

Gauge: in Herringbone stitch, 4.16 stitches per inch on #13 needles
in stockinette stitch, 2.35 stiches per inch on #13 needles

Using your 16 or 20 inch circular needle, cast on FIRMLY 79 stiches. Join, being careful not to twist.

Row 1: Slip one stitch, knit one stitch, pull the slipped stitch over the knitted stitch, but before you let it go, knit the slipped stitch through the back loop. Repeat around. You will have one stitch left over, and this becomes the first stitch of row 2.

Row 2: Knit one, but return this stitch to the left hand needle. Pull the 2nd stitch on the left hand needle over the stitch you just knitted, but don't pull it off the left hand needle until you've knitted it in the front loop (the usual way). Slip the next stitch (the one you knitted first) to the right hand needle. Repeat around.

Repeat these two rows until you have about 3 inches of hat body, enough to cover your ears, and end by finishing row 1. Knit two together (k2tog) around, knit the last stitch (40 stitches). Continue in stockinette stitch (knitting every round) until the hat body is about five inches deep.

Shape crown: As your hat circumference grows smaller, you will have to switch to either double pointed needles, or work with two circular needles of the same size.

Row 1: Knit 6, k2tog. Repeat around, 35 stitches
Rows 2-3. Knit around without decreasing.
Row 3: Knit 5, k2tog. Repeat around, 30 stitches
Rows 4-12: Knit around without decreasing.
Row 5: Knit 4, k2tog. Repeat around, 25 stitches
Row 7: Knit 3, k2tog. Repeat around, 20 stitches
Row 9: Knit 2, k2tog. Repeat around, 15 stitches
Row 11: K2tog around, knit the last stitch, 8 stitches
Row 13: K2tog around, 4 stitches

Cut the yarn leaving a 12 inch tail, thread and pull up the remaining four stitches, and secure.

Dreadlocks topknot:

Rasta does tend to kink a bit, but not enough to make dreadlocks consistently. I added a lot of twist to the yarn by cutting about a five-yard length (or just use up whatever yarn you have left), attaching one end to a chair, and the other end to an electric mixer. Before you twist the yarn with the mixer, make sure that the mixer is turning in the direction the yarn is already naturally twisted, or your yarn may fall apart. When the yarn is twisted well enough to kink, firmly wind it up around a book- mine was about five inches wide, but your mileage may vary. Tie the hank of twisted yarn tightly in one spot, and then slide (DO NOT CUT) it off the book. Now you will have lots of kinky loops that can easily be worked into dreads with a little patience!


CLICK HERE TO SHOP


Monday, June 28, 2010

PLAYING WITH RASTA


A few weeks ago I happened by my local yarn store in Charleston, Knit.

Sometimes there is yarn there that gives me happy tingles when I pick it up. This turned out to be one of those times. There was a massive new shipment of Malabrigo Rasta, so pretty I wanted to eat it. It was pricey, but the colors were SO BEAUTIFUL! Even though I am not at all a fan of super bulky yarns (lace and sock weight yarns are more my style), the colors were stunning, so I took a skein home just so I could play with it (and maybe drool on it a little too).


As soon as I had wound it into a ball, I discovered how Rasta acquired its name: it does tend to kink and worm a bit. It gave me the idea to make a scarf with dreadlocks. These scarves are incredibly fast and easy to make.


For the one on the left, cast 8 stitches onto size 17 needles, and knit every row (garter stitch) until there are about 18 inches of yarn left. Drop the first two stitches, bind off the middle four stitches, and drop the last two stitches as well. Carefully unravel the two edge stitches and gently twist into dreads. The scarf on the right was made exactly the same way, except the scarf was knit in stockinette stitch (knit one row, purl one row). This causes the scarf to gently roll up a bit so that all of the dreads end up on the same edge.


As cute and promising as these scarves were, I was really looking for something a bit more practical. I played with a scarf pattern in Herringbone stitch (HERE). This stitch really makes the most of the pretty texture and short color changes of Rasta, but the scarf was too thick and firm for my tastes, even though I used #17 needles.


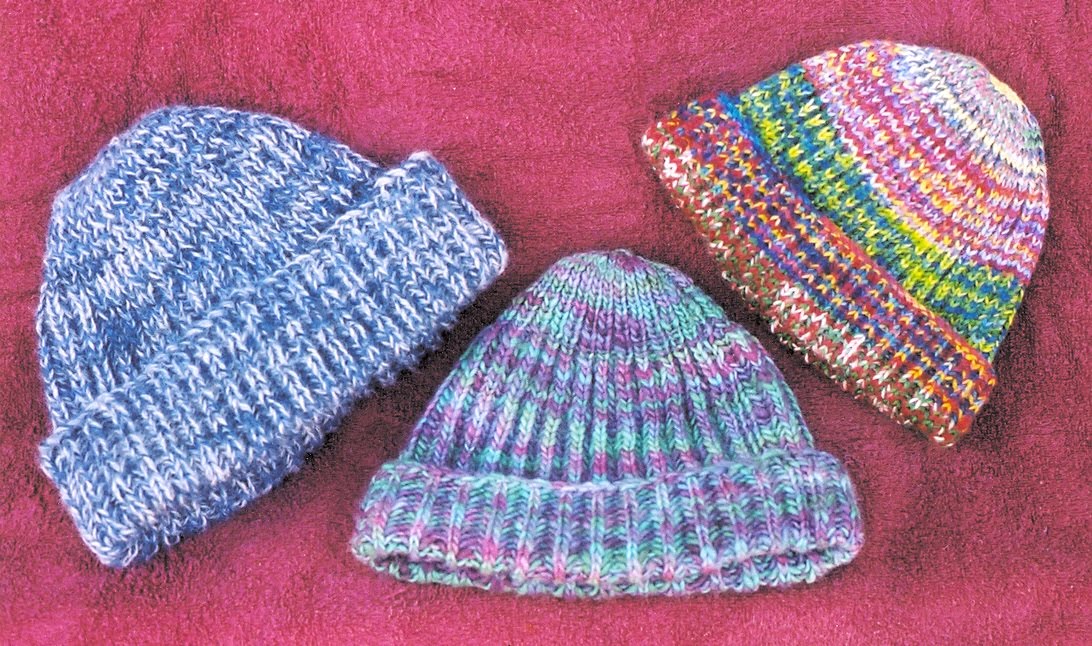
Bulk and firmness are not particularly good qualities in a scarf, but they are great qualities for warming up cold ears- yes, a hat!! (top photo) Success! And of course I had to top it off with dreads!

I promise to post the hat pattern in my next blog entry!

CLICK HERE TO SHOP

Tuesday, May 11, 2010

PRIME RIB


“Prime rib” is the name that Elizabeth Zimmerman gave to Brioche stitch, a stitch pattern that always involves a yarn over, slipping a stitch, and knitting two stitches together. There are many wonderful variations of Brioche stitch, but the purest and simplest form is prime rib.

I don’t recall exactly how I stumbled over the Brioche rib stitch, but it was probably when I was going through Barbara Walker’s First Treasury of Knitting Patterns. Talk about love at first knit! Here was a way to make a deep, tidy ribbing with no purling! I loved knitting the rhythm of the “yarn over, slip, knit two together” (which, when I teach this stitch to children, fits nicely to the tune of “One little two little three little Indians”). The resulting fabric knits up quickly and is thick and soft, perfect for scarves or hats.


Click to enlarge the pictures. You can fnd the pattern for the scarves (above) HERE.

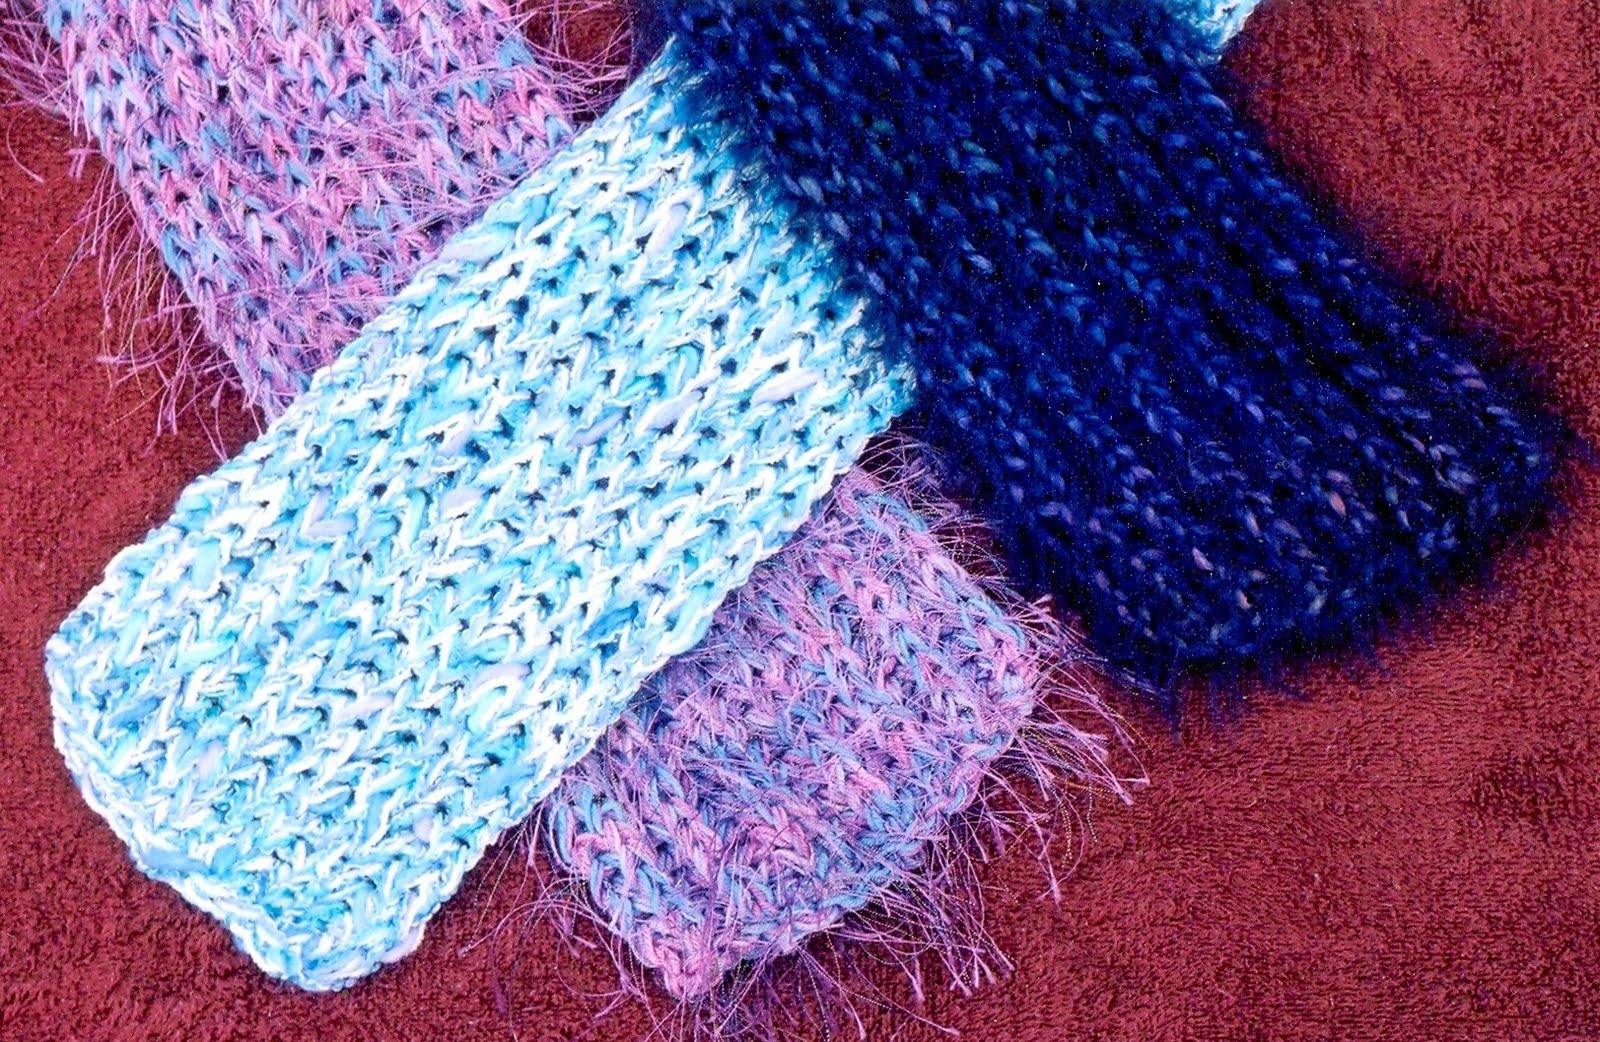
By doing a little experimentation, I also discovered that I could get cool zig-zagging puddles of color in a prime rib scarf by changing the needle size or number of stitches. When I used my hand dyed sock yarn, the result was the Colorwave Scarf, pictured below and at top (click to enlarge). You can find the pattern HERE.


Brioche Stitch from Barbara G. Walker, A Treasury of Knitting Patterns, 1968.

On an even number of stitches,
Row 1 (preparation row)- *Yo, sl 1, k1; rep from *.
Row 2- *Yo, sl 1, k2 tog (slip-stitch and yo of previous row); rep from *.

For a short video demonstrating this stitch, click HERE.

CLICK HERE TO SHOP

Tuesday, April 20, 2010

THE WONDERFUL VERSATILE HUMBLE DISHCLOTH


When I was learning to knit as a young teen, someone gave our family a white cotton hand knit dishcloth. It was just plain garter stitch knit on the diagonal, but for some reason it fascinated me. It was so soft, so absorbant, and so cleverly crafted. My mother stashed it in a kitchen drawer reserved for "special" things. (This drawer also included special potholders that I wove on a loom, special cross stitched aprons, special decorated towels, and many many other special items that she saved for over 50 years until she had to move out!) I made it my knitting goal to copy that dishcloth, and was exceedingly proud when I succeeded.

I still love making dishcloths! They are so cheap to make (less than 50 cents each), practical, and people love to receive them as little gifts. From a knitting perspective, they give me a cheap way to experiment with new color and stitch patterns when I am feeling creative, and they can also provide portable, mindless entertainment for those times when I need such.

Here are some of my favorites from over the years. The images are linked to the free patterns- just a click away!


To purchase hand dyed cotton yarn (perfect for dishcloths!) from Sara’s Colorwave Yarns, click on the banner below.

Monday, April 12, 2010

APRIL FLOWERS


Flame azaleas (above)

I have always been a nature lover. I adore outdoor sports such as hiking, canoeing, swimming, horseback riding, biking, even spelunking. I have found many inspirations for yarn colors in flowers, outdoor scenery, and rocks. Here in Charleston the azaleas are in full bloom everywhere. Here are some great yarns that grew out of spring flowers.

Orchids


Iris


To purchase hand dyed flowery yarn from Sara’s Colorwave Yarns, click on the banner below.

Friday, April 2, 2010

ELECTRIC SPINNING THINGS


I really love squishing color through fiber! It’s so much fun to see how the colors interplay, and to end up with some beautiful yarn! Kind of like having babies in a way. And also like babies, there is a great deal of laborious preparation and finishing work that goes with the process. I generally reserve one day a week for dyeing, and the rest of the week for purchasing supplies, winding yarn into skeins, rinsing, drying, untangling, labeling, accounting, scanning and uploading photos, winding skeins into balls, wrapping up packages, and trips to the Post Office. Yikes!

When things get really busy I enlist the help of the rest of the family, particularly with the winding and balling. At first my three children enjoyed winding balls by hand. Eventually I had to stand behind the kids with a bullwhip: “Wind FASTER you FOOLS!” “But Mommy my arms are TIRED!”

I finally got smarter, and purchased two machines which have been absolutely essential to my business: a heavy duty electric ball winder from Nancy’s Knit Knacks, and an electric skein winder from Fricke Enterprises. You can see them both going at once in the little video (I don’t generally recommend having both going at once because of potential tangles, but it made for a more interesting motion picture). Oops- you can also see lots of crud on the carpet, and clutter everywhere. Well, you can’t be good at everything. Maybe I will have to get that bullwhip out and get after the children with the vacuum cleaner!

To purchase hand wool sock yarn from Sara’s Colorwave Yarns, click on the banner below.

Saturday, March 27, 2010

EVOLUTION OF A COLORWAY


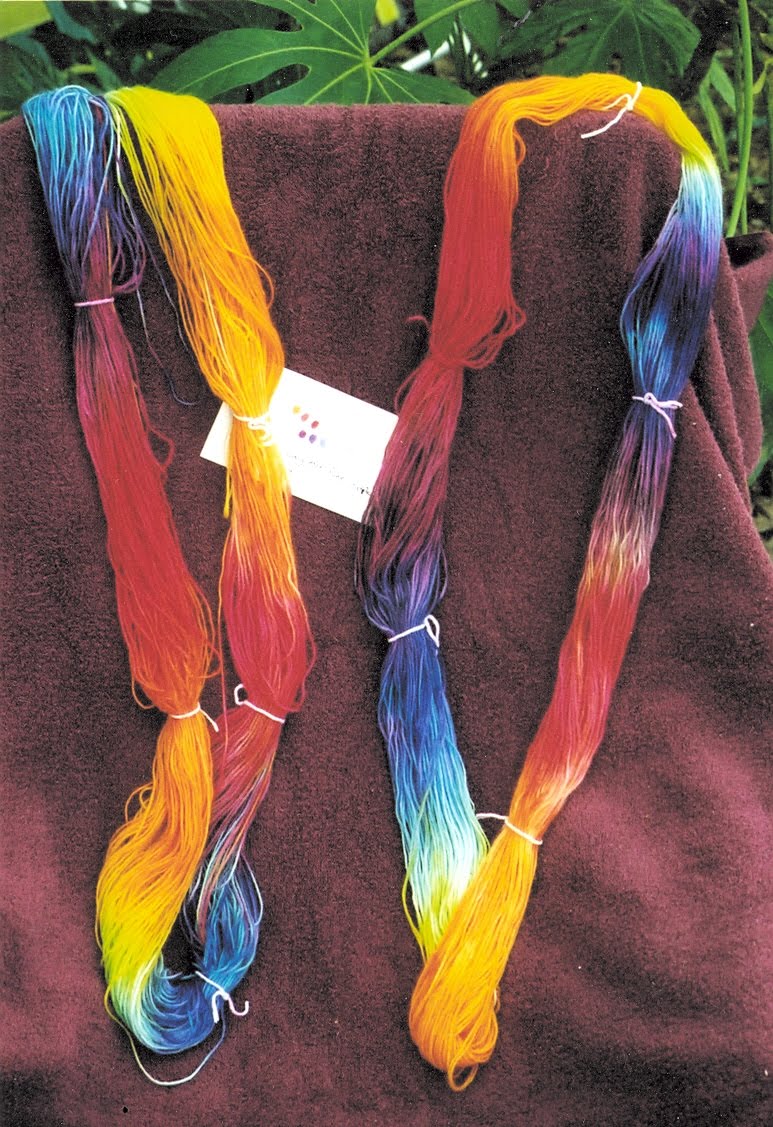
About this time of year our southern longleaf pine trees begin to shed their fuzzy pollen bearing thingies. My Aunt, who was a botanist, informed me these are called catkins. I picked up a few one day, and loved the play of colors: yellow-orange through scarlet, magenta, violet, and lavender. I had to get those colors onto yarn!


I wound some Patons Kroy sock yarn into big skeins, since the dye won’t really penetrate a ball of yarn very well. This yarn is 75% wool and 25% nylon. You can try this at home, but don’t try with any yarns less than 50% wool or the colors will be very pale.


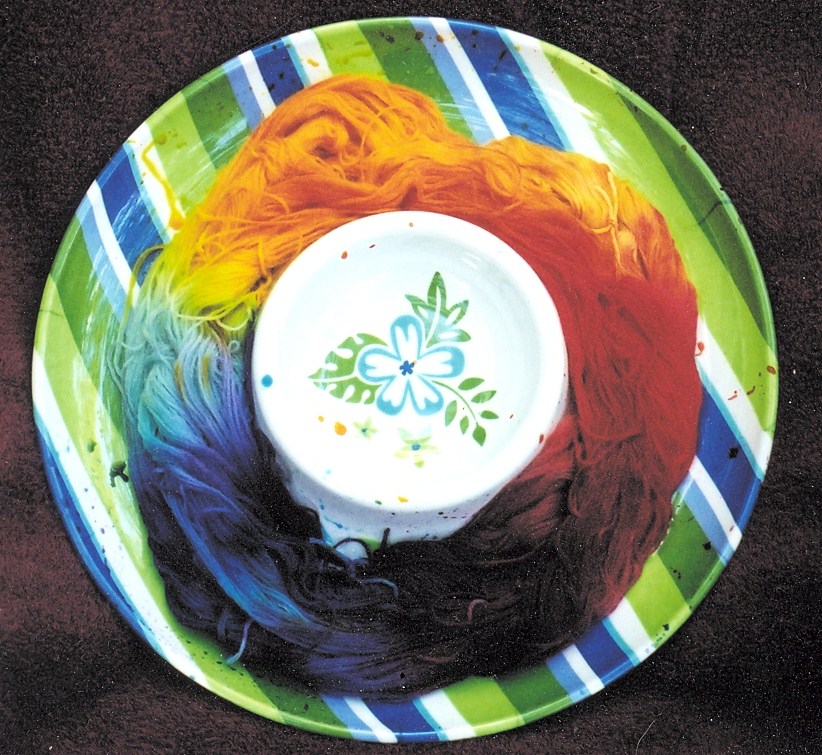
The wool skeins must be soaked (preferably overnight) to get them thoroughly wet, then swooshed around in a mixture of an ounce or two of vinegar to a gallon of water. Next they can be gently squeezed out (or spun in the washing machine) and placed on a surface for dyeing. I like to use the cheap plastic “Mexican hat” dishes designed for chips and dip. (I don’t put food in them afterwards!) The dye is placed on the wool, and gently squished around with a gloved hand. In this photo I used Wilton icing dyes, which come as a paste in little vials. The colors are very vibrant, but will fade and wash out over time. I use commercial acid wool dyes now, which are quite toxic to work with but much more permanent.


After the colors are just right, the skein of wool is carefully wrapped in cling wrap. This step can be quite challenging with rubber gloves on! The wrapped wool is placed in a microwave safe dish, then cooked on high for about five minutes. As the wool is cooking your house will begin to take on the odor of wet sheep and vinegar! Yum! The wool is allowed to cool, unwrapped, rinsed in the weak vinegar solution again, gently washed, hung to dry, and wound into balls.


Finally you get to knit it into some awesome catkin socks!


CLICK HERE TO SHOP